Wednesday, November 16, 2011

Nighty Night

I got another piece of furniture done finally! I found this guy on my last trip to Warrenton. Remember him?
 I needed a nightstand on the other side of my bed and this guy fit the bill. It was only $20 and I knew that I could make it shine (or I hoped so anyway).  It really wasn't a terrible color to start off with but it was a little worse for wear, especially on the top so I had to change it up a bit. Here are some before shots:

See the worn out top?
It's just the perfect size, I had to make it sparkle. (Scratch that-sparkle sounds like a rare piece of jewelry or a my little pony. So not sparkle but at least look better than it did before.)
Next came the sanding. I don't know if I've really shared my aversion to sanding. I mean I love the finished product part, and the using a power tool part (because you just feel a little cooler than you semi know what your doing with a power tool). But the ACTUAL sanding part is definitely not my favorite. First of all, there's lots of dust, I mean ALOT. So much I think I actually got a cold from all of it the last time around. Note to self: Always protect your face when sanding or will cough, sneeze and feel miserable for days. So now I have a oh so chic pink bandana to not only make me look like the least intimidating robbery suspect but to make sure I don't inhale lots of dust from the sander. So sorry for that ranting, I'll get back to the table now.
I started sanding this guy and realized that it was wood veneer and not real wood. Mwah wah... cue sad face. I should have checked it a little more when I bought it but I just got so excited and didn't quite inspect it like I should have. So I was sanding and did the best I could to get some stain off and make it as even as possible.

After I got to this stage, it was time for the staining process. I used the same brush on, wait 15 minutes, and wipe off process that I used on the coffee table with the Minwax Dark Walnut stain.


I started with the drawer just to make sure that I still liked the stain. That all went very smoothly and I was really happy with the result so I moved on to the table base. Side note: I removed the hardware and taped the bottom of the legs so to not get any stain on them. I also used my orbital sander to take off the initial coats of stain, which even on the veneer, worked pretty well. I used 80 grit at first, and then a 220 to smooth it all out.

It was at this point, I was still optimistic...and then... it turned into this.


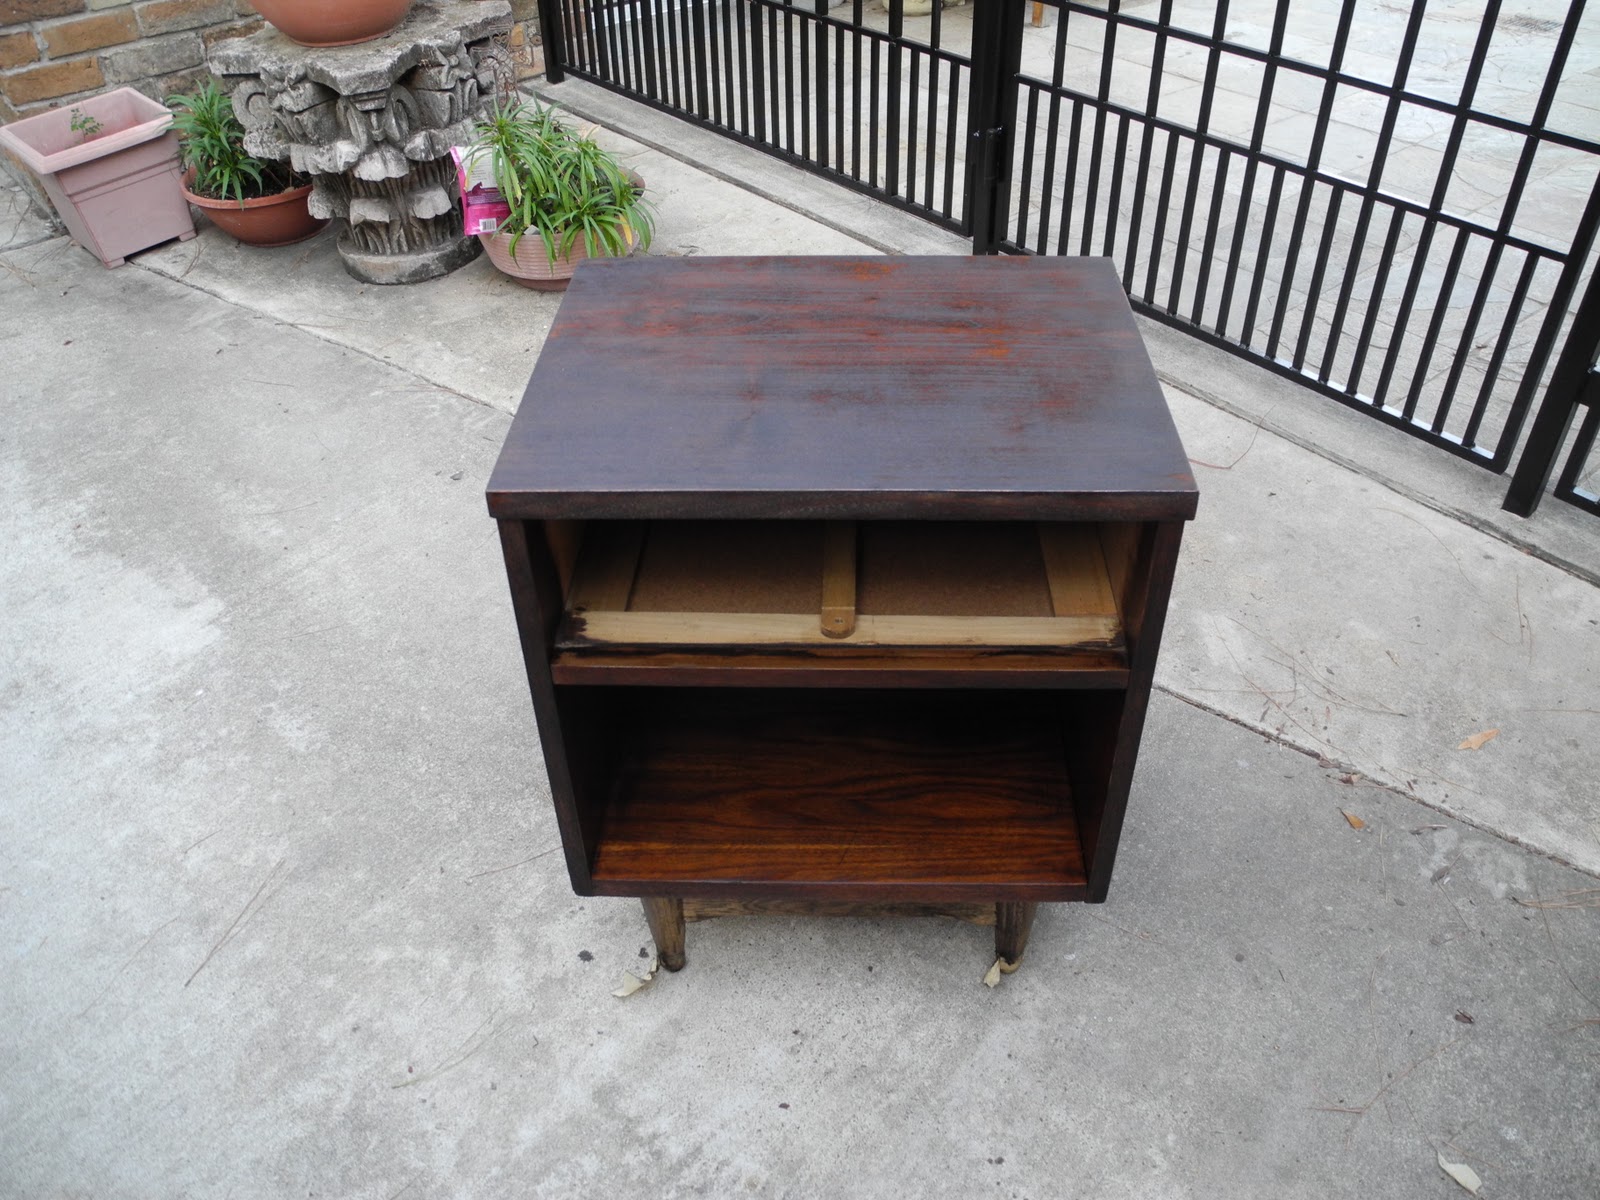
It doesn't look quite as bad in the pictures as it did in person. I'm actually being a bit dramatic. The sides, inside, and drawer front came out perfectly. But the legs, crossbar and top sadly did not. It was a major bummer that the stain didn't cover very evenly and ended up being really dark on the top and legs were not quite the same color. After a minor panic moment, I re sanded the top and tried again. I was more concerned about that than the legs because they are more visible. (Picture to come) All I did for the legs was add a second coat and the color turned out a little more normal.
Here's a look at the legs before the second coat. It's not bad, just not the same color as the rest of the table.
Second coat!

I sanded the top and legs again, just a quick sand and re stained it and that seemed to do the trick.  I buffed out the hardware, because it's so mod and cute I couldn't think of something better to replace it.


 Here's the finished product. I added some frames just to give the picture some scale. It's exactly the right size and even after some minor problems, it really did turn out like I wanted.

The more I do this hopefully the better everything will look!

I have one or two more projects that I want to finish before it starts to get really cold outside. As much as I  like doing this, if it's less than 50 degrees (and it does happen in Texas...occasionally) then my motivation to spend hours outside changing the appearance of my little projects pretty much goes down to zero. Hopefully I can get them done, otherwise, I'll have to start finding projects that are more easily achievable indoors.

Happy Friday!

Friday, October 28, 2011

Typography

Typography. It's one of those buzz words you keep hearing around the web, mostly thanks to Pinterest, design blogs, and other such social media outlets. Being the font lover that I am, I immediately jumped on that bandwagon. Here's what wikipedia has to say about it:

Typography (from the Greek words τύπος(typos) = form and γραφή(graphy) = writing) is the art and technique of arranging type in order to make language visible. The arrangement of type involves the selection of typefaces, point size, line length, leading (line spacing), adjusting the spaces between groups of letters (tracking) and adjusting the space between pairs of letters (kerning). Type design is a closely related craft, which some consider distinct and others a part of typography; most typographers do not design typefaces, and some type designers do not consider themselves typographers.[2][3] In modern times, typography has been put into motion - in film, television and online broadcasts - to add emotion to mass communication. [4]
Typography is performed by typesetters, compositors, typographers, graphic designers, art directors, comic book artists, graffiti artists, clerical workers, and anyone else who arranges type for a product. Until the Digital Age, typography was a specialized occupation. Digitization opened up typography to new generations of visual designers and lay users, and it has been said that "typography is now something everybody does."[5]


For a doodler like me, the fact that fonts and doodling is trendy right is pretty much a dream come true. I mean, designing my own font in computer class in high school was my favorite day all year. When I discovered dafont.com , 1001fonts.com , urban fonts, font squirrel, and lost type ,where you could download fonts for free, I was sold. Now with photoshop, and other such programs, you can create pretty much custom anything. Sidenote: If you were wondering if I've spent too much time searching different fonts on font websites, pinterest, and even google, then your answer would have to be yes.

Here are some recent little things I've been working on with fonts:


I designed this mousepad with photoshop and then converted it into a JPEG, sent it off to Shutterfly and one week later voila, mousepad!


I found all these awesome pictures via Pinterest :


I just love that hand drawn look. It's all about attention to detail and when it's done right it can add a much more personal aspect to something instead of a shiny, uniform and glossy computer image or font.

They inspired me to take up my dooding habit again, well so to speak because let's face it I never REALLY gave it up, and see what I could come up with. I started finding pictures I liked and tracing them, to see and how they drew each letter and how I could recreate it or come up with my own. I probably could have skipped that step but I love tracing. Is that weird? Most likely, but I'm still admitting it right now for the world to read. That's right people, I love to trace. I love nothing better than when I can pull out my light tray and trace paper and go at it with a little piece of graphite in my hand. The way your hand and neck get a cramp at the same time because your focusing so hard  and you are unaware that you are now completely hunched over in a really uncomfortable position. Yeah, I I love that. I mean obviously not the neck hurting part but when your so focused on something and then finally step back and look at the finished product is such a great feeling. It reminds me why I love art and renews my respect for artistis, designers and architects once again. I know I'm rambling but you have to admit it's inspiring to think that people created wonderful sketches, and drawings and blue prints to scale without any digital help.

Enough of my soapbox, here's some of my attempts at attempting the fonts that I've fallen in love with.

I worked on some envelopes and gift tags and then one notecard. I know I know the quote IS from the golden girls and I did use 80's pastel watercolor but I was just experimenting. I ended up using a deeper purple to darken the letters so they were more visible too. I got the inspiration for that last notecard from a picture I saw of a notecard where they used white pencil first and then painted watercolor on top of it. That way the pencil repels the paint and the white letters show through. I'm going to try that next, I just had a hard time actually finding my white colored pencil, so pink had to work!

If your now reading this paragraph I thank you for reading all my silly font nerd ramblings. I thank you from the bottom of my heart. OK, not the bottom, but close to it. I have been working on some other projects I hope to be posting pictures of soon!

Happy Friday! It's finally feeling like fall in Texas today!

Monday, October 3, 2011

WarrenTON

It’s that time again. That time where my 23 year old self heads to middle of nowhere Texas to go antique shopping, much to my friend’s confusion. Actually, to be honest, my friends would not find this surprising from me at all. To my defense, if you were to come with me, I have a feeling you would catch the bug too. Round Top holds a bi-annual antique show that is one of the biggest in the nation (I actually don’t know that for a fact but it has to be) Vendors from all over the country come to sell they’re best stuff at a great price. Now I normally hit up Warrenton, a small town near Round Top that has miles of booths and vendors that are a little cheaper because it is all outdoors,  instead of the big show because I want to really dig through the junk and find treasures. Check out my last visit to Warrenton to see my previous treasures: http://creativeallthetime.blogspot.com/2011/04/round-topwell-almost.html

 I’ve written about my Warrenton/Round Top purchases before (and how much I love them) and how much luck I have had there.  This year was no exception. I headed down after a short trip to Waco to watch my Bears beat my hometown Rice owls (sic em!). After a few wrong turns and a stop at Buccee’s I finally made it. If you want a tip, I like to park at Carl’s  (large white building with some nicer antiques and booths inside) because it’s nice, easy to remember and get in and out of, and it’s free.  Carl’s place also has a booth with great old school pennants, including my alma mater (again sic em).  Then I headed out, braving the Texas heat to find some good deals. The past few times I’ve been out there the weather has been unnervingly perfect so I knew that it was only a matter of time before the Texas I typically call home  (aka over 100 degree weather at the end of September)  showed itself.  We headed out towards some of my favorite booths that have lots of over sized architectural salvage and interesting furniture. Designers frequent this part because they have such awesome stuff, again you have to dig to find the real deals but everything is at a better price than it would be in a store. I love all the architectural salvage because it gives such wonderful ideas of what I could make or how to re purpose or reuse something to make it something unique and personal. 
Driving into Warrenton


I wanted these little lockers so bad!
Love that car bumper.


Wouldn't that Vegas looking sign look so great in a cute downtown loft somewhere?? My mind was buzzing when I saw this!

I LOVED LOVED LOVED this, but they wanted too much for it :(


We continued on into junk heaven  and did end up finding some great things including my new little nightstand.  As soon as I saw it I was in love, the handle, the mid century modern style, I was drooling. I try really hard not to make a beeline for the things I love, but typically I become a five year old child again running towards something shiny. I know it’s bad antique etiquette (definition to follow). I did it anyway and after the owner told me the price, I was sold. My $20 nightstand is slightly beat up but still in great shape and is just so awesome, don’t you think?

Antique Etiquette: you must not run, jump or lunge, towards things. This will cause others to look at the most magnificent piece that you have bought and after seeing how beautiful it is they will use your good style sense and snatch it up before you can. If you grab it and pick it up, don’t let go unless you really really don’t want it and are OK with giving it up. These rules were self learned after having one too many vultures (mostly with white powder puffs on top of their heads) steal my lovely finds.

After this find I spend another hour or so wandering around scouring booths for something special. I did find this little cutie:


I also found lots of crazy things...LOTS of crazy things. I know I've tried to explain it before but really only pictures do it justice.


Do you smell that smell?
What SHOE doin?
This is Julio. He's become a staple in Warrenton. He even made a cameo in my last post about my junk hunting. He's quite the charmer.

Really who doesn't need a giraffe leg table?

This is awesome. If you haven't seen Picker Sisters on Lifetime, it's a show about 2 designers that find unusual junk and re purpose them into unique and chic pieces.

My poor little feet were definitely feeling it at this point. This may have been this pair of Rainbow's final run.


Needless to say, it's always an adventure what you will find when you venture into Junkland searching through the TON in WarrenTON. Despite the heat (I wish the weather would have been more like this past weekend!) I did have a great time and I'm excited to see what my cute little nightstand can become! I already spent this Sunday afternoon sanding it down getting it ready to re stain. But I'll have to focus because now that it's officially fall, there's so many other fun things to do outside! I'm also really excited about trying this recipe so I'm sharing it on my blog, hope you enjoy!!


Thursday, September 29, 2011

The one with the Table

OK, so I posted a few pictures a little bit ago of some new pieces that I was getting ready to refinish. Well, FINALLY after lots of experimentation I finished one of the two pieces. I know I know, it took forever but having a plan of refinishing and then actually executing it are two entirely different beasts. My fluffy dreams of re staining this coffee table were replaced by the realities of 100 degree weather, sanding, wind, more sanding, not having hours on end to wait for the stain to dry, did I mention sanding? So I might be exaggerating a bit but it did take alot longer than I had anticipated. I'm gonna try and make this short but I have a feeling that I'm channeling Storybook Lady from "You've Got Mail" today so bear with me.
I found this table at Goodwill a few months ago for $15. I immediately thought that I could fix the little stubby table in no time flat ( it may have been wishful thinking at that point).


I took the little guy home and then he sat. He sat in the garage for awhile. He waited so patiently for me to make him handsome. Poor little coffee table, he was neglected in the heat for a lot longer than I wanted him to be. But I finally remembered that he was out there still waiting for a makeover and decided to get started. My vision was for him to be super dark, an almost black stain at first. But, I changed my mind and thought that a dark brown would be a little bit warmer and bring out the grain a little better. I also realized after 30 minutes of trying to hand sand this table, that I ABSOLUTELY needed a different approach. See, I'm working on the whole patience thing but I haven't quite got the knack for it yet. Time for a Lowe's trip! I did a little research so I was 90% sure that what I needed was an orbital sander. It's a great tool for refinishing as well as lightweight and pretty inexpensive. I was pretty excited to buy my first power tool I have to say. See, I've used plenty of power tools but I haven't actually purchased my own, I normally rely on dad's garage for that.  It was pretty monumental I have to say. I picked the De Walt because it's one of the best brands of power tools (thanks for that tip dad) and it was the best price too.

Power tool!

Oh my goodness, did that orbital sander makes things easier. That table went from an ugly stain (see picture above) to this in only around 30 minutes!

Some of the scratches that went pretty deep.


My moment of excitement wore off once I realized that there were a few deep scratches in the table and I decided that I needed to sand it down to the bare wood with no stain showing. After a little bit more time I got it to look more like this:
Almost there!

Finally I got most of the scratches out and got the stain off.

Woo hoo! Sorry for the excessive amount of photos during the staining process but it was completely gratifying to take it back to the bare wood and start over from scratch. I went over the table with a finer grit sandpaper as well to achieve a smoother surface that would soak up the stain more evenly. Sandpaper tip: the higher the grit size (120,220 etc.) the smoother the outcome on the table. I started with a lower grit to get the stain off, it was about an 80, then switched to a 120 and 220 to achieve the smoothness I was looking for.

Next was time to stain. Since I'm a beginner at the re-staining process I decided to start with the bottom of the table just for practice. I removed the legs, went ahead and sanded the bottom and got to work.
Pre-sanding

Ready to stain. Sidenote: Getting the underside of this table to this level was quite extreme because, you see, those little decorative pieces, they're glued on, so it made the sanding process a little more difficult. Luckily, they are on the underside so I figured that you wouldn't see them very easily.

I also added these braces on the underside so that the table would be a bit more sturdy. The planks were a little loose so with this addition and the tightening of the brackets, it was as good as new.

These little cuties were also a little obstinate. They did not want to lose their stain. It was like an episode of "What not to Wear". I had to put them in a 360 degree mirror, tell them they looked awful and then reluctantly shed them of their former shell to show them what pretty feels like.

My supplies: A staining brush, Minwax Dark Walnut stain (I really love this color- it's warm and beautiful), paint thinner and a jar to clean my brush.

The next few pictures are the process of the stain. Paint it on, wait 20 minutes, wipe it off, wait 3-4 hours and start over. It was a little tedious but the outcome was well worth it.


I learned that it is really important to try to achieve an even coat and equal time over the table (i.e. start on the same side of the table for putting the stain on and wiping it off for a more even finish). I also really loved how dark it looked with the stain on, just not the sticky part.


Finished underside


Sanded and ready to go!

Again, I loved the way the stain looked before I wiped it off, I'll have to figure out how to achieve that look for the next time.

Almost done...

I finally finished, and I thought I was done. But I was wrong. Why is it that projects ALWAYS take longer than I think they are going to? It was pretty vital that I add a top coat though. I didn't want the stain to chip or yellow or I had to add a layer of Polyurethane (I stuck with Minwax for the poly too). The next challenge was to add the poly without letting any dust or dirt, leaves or various other debris blow onto the table. So, I set up a little top coat tent. Yep, you heard me right, top coat tent. It was pretty ingenious. I found a canopy in the garage, as well as some industrial plastic wrap. I managed to wrap the plastic wrap around the poles of the tarp so that it was  now wind proof! I'm sad to say I didn't take any pictures of it though ( I'm actually really sad I forgot about this because other than looking like something out of a sci-fi movie, it was pretty cool). 

Then, wait for it, I was done! I kept the jumping for joy to a minimum don't worry but I love the way that it turned out, here it is all finished:


I mentioned earlier that this was a completely gratifying process, to take something cheap, strip it down to the bare bones and build it back up again. Even though it took longer than expected, I'm actually really proud of this little guy for pulling through. It just shows there are amazing things out there if you can only see the potential. Being in the design world, I've been learning that all the time. People tend to overlook the cheap and put the pricey on a pedestal. While I have all the respect for pricey (there are some magnificent designs and sometimes you do get what you pay for) there is also something to be said for making that beautiful thing for yourself and letting your creativity shine through. Whew, I told warned myself that this one was going to be a long post, and  I have a new little nightstand I'm ready to tackle next so I better get started soon!  Let me know what you think or if you have any tips of staining!